Tips from a Chess Grandmaster
- Introduction
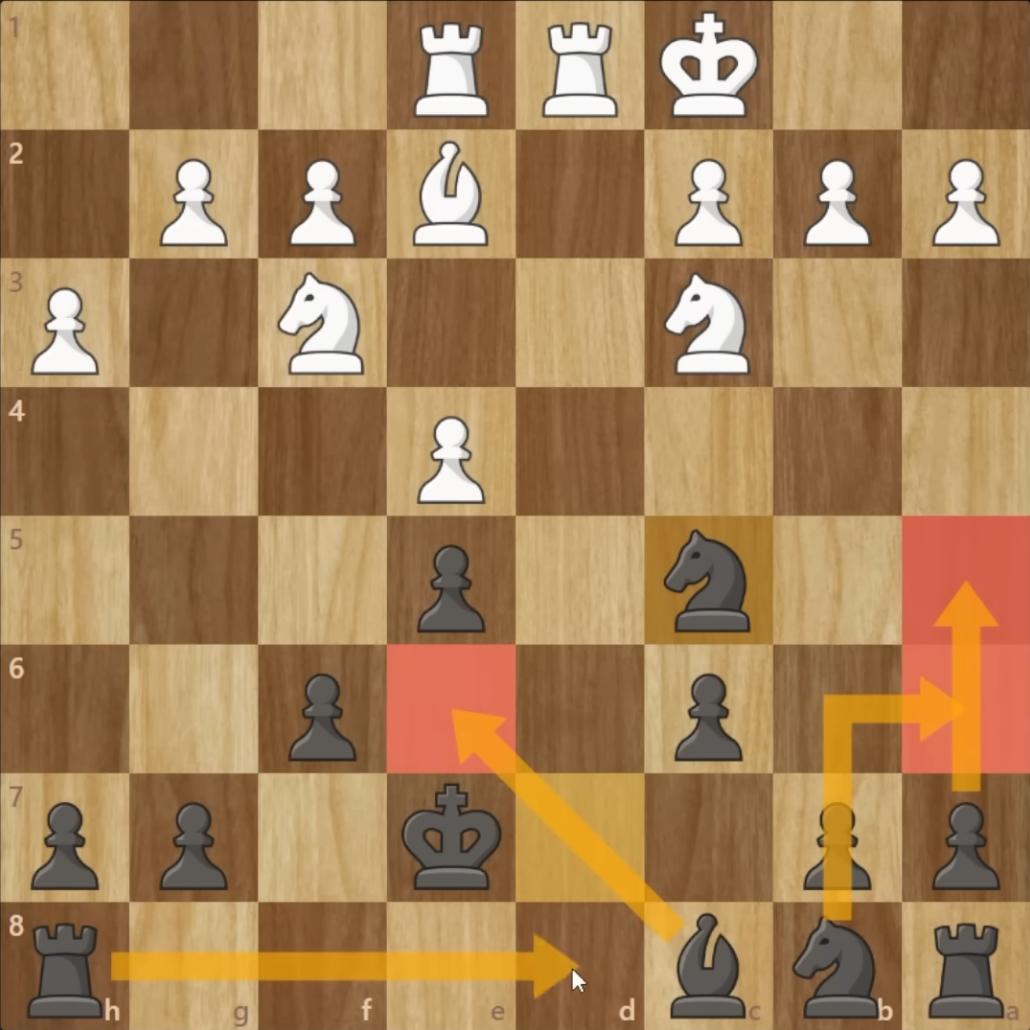
- Tip 1: How a Knight on d3 (or d6) Controls Key Squares and Stops Counterplay in the Carlsbad Structure
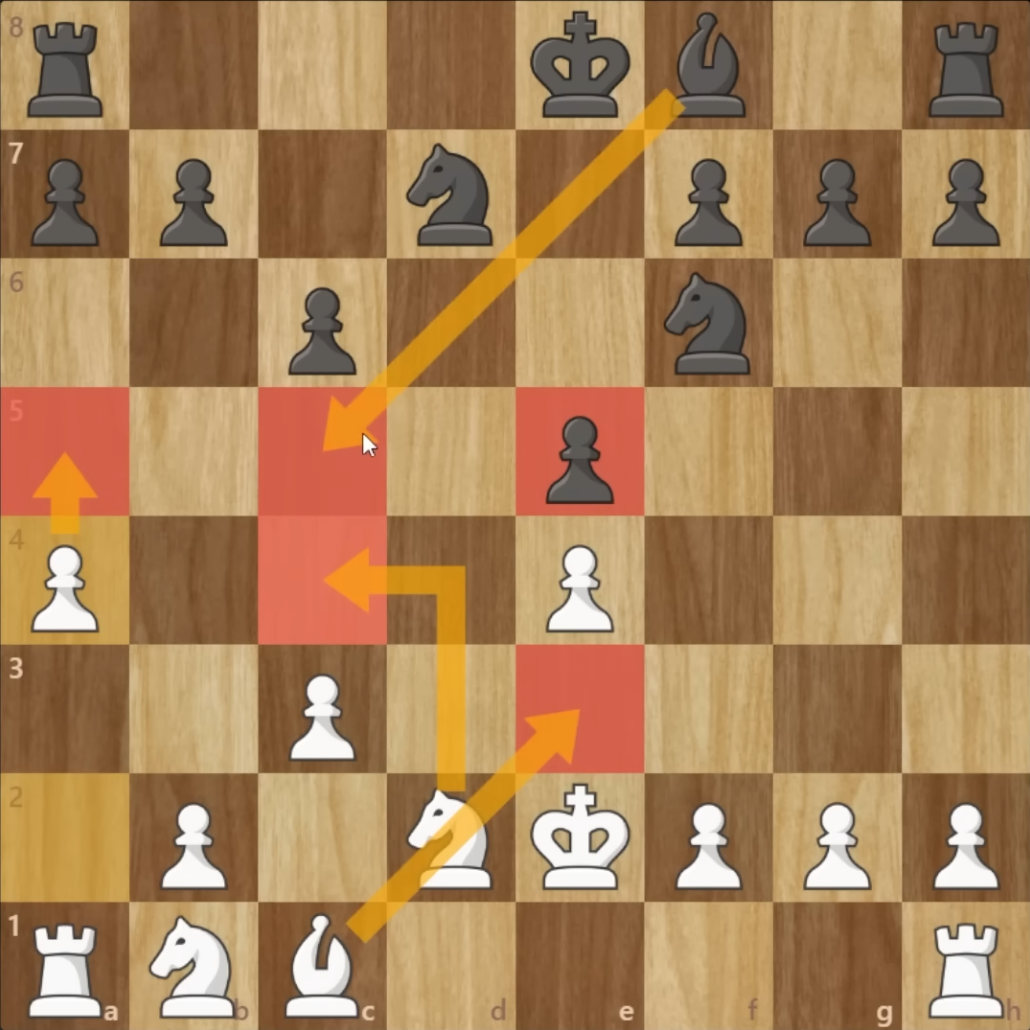
- Tip 2: Restricting a knight’s moves with G/B-pawns
- Tip 3: Playing Positions After a Queen Exchange on d8 or d1
- Tip 4: Playing With and Against the Bishop Pair
- Tip 5: Using Knights on c6 and e7 to Counter the French Exchange Variation
- Tip 6: Countering the e6-f5 Structure with the g4 Pawn Break
- Tip 7: Using h-Pawn and a-Pawn Pushes to Exploit Fianchetto Setups
- Tip 8: How to Deal with Aggressive Knights on f5 or f4
- Tip 9: When to Pin a Knight and When Not To
- Tip 10: Using the Queen on g4 with an Advanced e5 Pawn to Create Pressure
Introduction
GM Aman Hambleton started a new YouTube series called 100 tips only a Grandmaster knows. At the time of writing, 10 episodes are available, but I’ll keep this post updated with the release of potential new videos.
The content shown below are my notes from the entire series. I’ve kept them intentionally technical because I’ll use them to refresh my memory if needed.
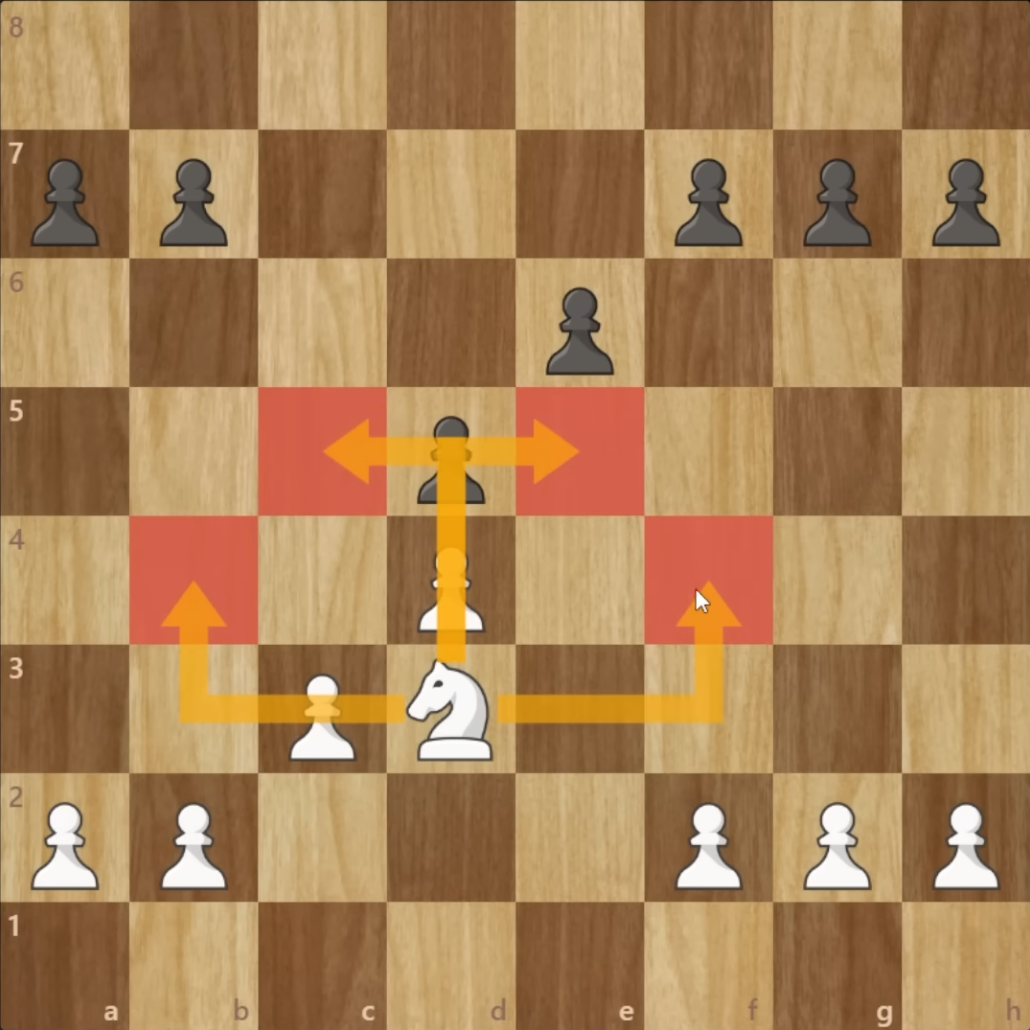
Tip 1: How a Knight on d3 (or d6) Controls Key Squares and Stops Counterplay in the Carlsbad Structure
Core Concept
- In the Carlsbad pawn structure (pawns on d4, c3, and b2 for White, or d5, c6, and b7 for Black), a knight on d3 (or d6) is incredibly powerful.
- The knight serves as a multipurpose piece, controlling key squares, preventing counterplay, and supporting your own plans.
Why the Knight on d3 (or d6) is So Strong
-
Controls Key Squares:
- b4: Prevents Black’s minority attack (b5-b4).
- c5: Creates an outpost for the knight or controls Black’s pieces.
- e5: Controls the center and supports potential attacks.
- f4: Facilitates pawn pushes like f4.
-
Prevents Counterplay:
- Stops Black’s minority attack by covering b4 and discouraging pawn breaks like b5.
- If Black plays b5, White can respond with b4, creating a strong outpost on c5.
-
Supports Your Pawn Structure:
- Defends the b2 pawn (or b7 pawn for Black), ensuring it is well-protected against attacks (e.g., from a rook or queen on the b-file).
-
Sheltered Position:
- The knight is well-protected by the pawns on d4 and c3 (or d5 and c6 for Black), making it difficult for the opponent to attack or dislodge it.
Typical Plans with the Knight on d3 (or d6)
-
Preventing the Minority Attack:
- The knight on d3 stops Black’s b5-b4 plan, the most common counterplay in the Carlsbad structure.
- If Black tries b5, White can respond with b4, securing the c5 square for the knight.
-
Creating Outposts:
- The knight can jump to c5 or e5, creating strong outposts that dominate the board.
-
Facilitating Pawn Breaks:
- The knight on d3 supports pawn pushes like f4, which opens the kingside for an attack.
-
Defending Key Pawns:
- The knight defends the b2 pawn, ensuring that Black’s counterplay on the queenside is neutralized.
Practical Examples
1. Carlsbad Structure for White
- Pawn structure: d4, c3, b2.
- Knight on d3:
- Controls b4, c5, e5, and f4.
- Prevents Black’s b5-b4 minority attack.
- Supports pawn pushes like f4 or a4.
2. Carlsbad Structure for Black
- Pawn structure: f7, e6, d5.
- Knight on d6:
- Controls b5, c4, e4, and f5.
- Prevents White’s queenside counterplay (e.g., b4).
- Supports pawn pushes like f5 or a5.
Key Themes and Advantages
-
Versatility:
- The knight on d3 (or d6) is a multipurpose piece, excelling in both defense and attack.
-
Prevents Counterplay:
- By controlling key squares, the knight neutralizes the opponent’s plans (e.g., the minority attack).
-
Supports Your Plans:
- Facilitates pawn breaks (e.g., f4 or b4) and creates strong outposts on c5 or e5.
-
Works for Both Sides:
- The same principles apply whether you are playing as White or Black.
Example Games
1. Magnus Carlsen vs. Aman Hambleton:
- White’s Plan:
- Magnus placed a knight on d3, controlling b4, c5, and e5.
- Black’s counterplay with b5 was neutralized, and White dominated the position.
- Key Lesson:
- A knight on d3 (or d6) can completely shut down the opponent’s counterplay.
2. Aman Hambleton vs. GM Opponent (London System):
- White’s Plan:
- Aman placed a knight on d3, supported by pawns on d4, c3, and a4.
- The knight controlled key squares and supported a kingside attack with f4.
- Key Lesson:
- The knight on d3 works beautifully with an advanced a-pawn and supports both defense and attack.
- The knight on d3 works beautifully with an advanced a-pawn and supports both defense and attack.
Openings Where This Structure Occurs
-
Queen’s Gambit Declined:
- After White plays cxd5, the Carlsbad structure arises for Black, and a knight on d6 becomes powerful.
-
Caro-Kann Defense (Exchange Variation):
- The Carlsbad structure arises for White, and a knight on d3 dominates the board.
-
London System:
- The Carlsbad structure is common, and White’s knight on d3 plays a key role in controlling the queenside and supporting kingside attacks.
Key Takeaways
- A knight on d3 (or d6) is a powerhouse in the Carlsbad pawn structure.
- It controls key squares, prevents counterplay, and supports your plans.
- Look for opportunities to maneuver your knight to d3 (or d6) in games with this pawn structure.
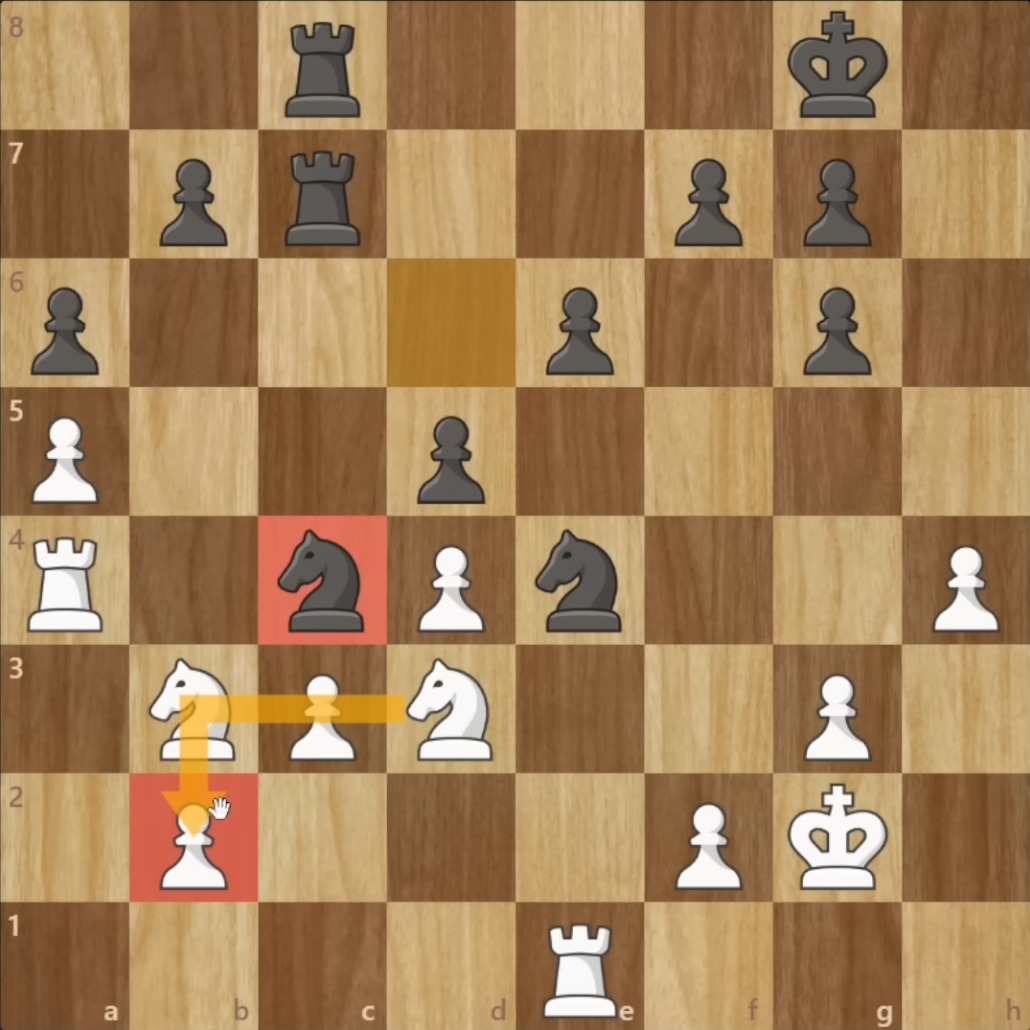
Tip 2: Restricting a knight’s moves with G/B-pawns
tl; dr
- Play G3 against a Knight landing on G6 to restrict the knight, then h4
- On the other side of the board, start with h5 against a knight on g4 (if black), threatens to kick the knight, effective even if opponent does h4, because h3 no longer possible and we can an forever outpost.
- G3 weakens the king, but if we have the light squared bishop, it can be tucked there to control them
General Concept
- When a knight lands on b3, g3, b6, or g6, specific pawn moves (e.g., g3, h4, h5) can effectively neutralize the knight and gain strategic advantages.
- This applies to both sides of the board but is more common on the kingside due to castling and pawn structures.
Key Moves and Ideas
Against a Knight on g6 (or g3)
-
Move g3:
- Immediately play g3 to restrict the knight’s movement and deny access to important squares like f4 and h4.
- This move can be played preemptively or after the knight reaches g6.
- It simplifies handling the knight and shuts down its activity.
-
Follow-up with h4:
- After g3, play h4 to prepare h5, kicking the knight off g6.
- If possible, push h6 to gain additional space and restrict the opponent’s pawn structure.
-
Combination of g3 and h4:
- The combination of g3 and h4 is extremely effective against knights on g6 or g3.
- If the opponent responds with h5 to block your pawn, you can still play g3, trapping the knight in most cases.
-
Knight’s Retreat:
- After h4 and h5, the knight often has no good retreat squares, leading to a dominant position for you.
Against a Knight on b3 (or b6)
-
Move b6:
- Play b6 to restrict the knight’s movement and deny access to squares like a5 and c5.
- This is less common than the kingside scenario but still effective.
-
Follow-up with a5:
- Push a5 to gain space and further restrict the knight’s activity.
- If possible, push a4 to lock the structure on the queenside.
-
General Consideration:
- These ideas are less frequent on the queenside because they don’t directly target a castled king, but they are still useful for restricting the knight.
Practical Examples
Example 1: Caro-Kann Defense
- Position: After a knight lands on g3.
- Plan:
- Play h5 immediately, attacking the knight.
- If white responds with h4, the knight remains restricted, and the pawn on h4 becomes a target.
- Follow up with g6 to solidify the pawn structure and dominate the g4 square.
Example 2: Ruy Lopez
- Position: Black plays Ng6, and white does not respond correctly.
- Plan:
- Play g3 to restrict the knight.
- Follow up with h4 and h5 to kick the knight off g6.
- If the knight retreats to f8, white gains a significant positional advantage.
Example 3: Nimzo-Indian Defense
- Position: White plays Ng3.
- Plan:
- Play g6 to restrict the knight’s movement.
- If white castles kingside, follow up with h5 to attack the knight.
- Use the h4 square for a bishop or rook to dominate the kingside.
Key Tactical Motifs
-
G3 and H4 Combination:
- This combination effectively neutralizes the knight on g6 or g3.
- It also creates space and opens attacking opportunities on the kingside.
-
Pawn Pushes (H5 or A5):
- These moves gain space and destabilize the knight’s position, often forcing it to retreat.
-
Restricting the Knight:
- The knight on g6, g3, b6, or b3 often has limited squares, making it vulnerable to pawn pushes.
Practical Advice
- Be proactive when you see a knight heading to g6, g3, b6, or b3.
- Play g3 or b6 immediately to restrict the knight.
- Use h4 or a5 to attack and destabilize the knight.
- These moves are especially effective against lower-rated players who may not anticipate the positional consequences.
Example Opening: English Opening
- Position: After 1. c4 e5 2. Nc3 Nf6 3. Nf3 Nc6 4. e4 Ng6.
- Plan:
- Play h4 immediately to attack the knight.
- If black responds with h5, the knight becomes unstable, and white gains space.
- Follow up with g3 to restrict the knight completely.
Tip 3: Playing Positions After a Queen Exchange on d8 or d1
Core Concept
- In positions where the queens are exchanged early (e.g., on d8 or d1) and the king recaptures, the side with the displaced king often has an advantage, despite engine evaluations sometimes favoring the opponent.
- The displaced king can become a powerful asset in the endgame and allows for dynamic piece placement.
Key Plans for Black (or White, Symmetrically)
-
King Placement:
- Place the king on e7 or c7 (for Black) and e2 or c2 (for White).
- The king is safe and well-positioned for the endgame.
-
Pawn Structure:
- Play c6 (or c3 for White) to solidify the center and control key squares.
- This move also restricts the opponent’s knights and facilitates piece development.
-
Bishop Trades:
- Trade the bishop that matches the color of your central pawns:
- For Black: Trade the dark-squared bishop if the central pawn is on e5.
- For White: Trade the light-squared bishop if the central pawn is on e4.
- Keep the remaining bishop, which becomes a key piece in the endgame.
- Trade the bishop that matches the color of your central pawns:
-
Knight Development:
- Develop knights to d7 (or d2 for White) rather than c6 (or c3), as c6/c3 is better used by pawns to control squares and restrict the opponent’s pieces.
-
Key Pawn Moves:
- Use a5 (or a4 for White) to control the b4 (or b5) square and prevent pawn breaks by the opponent.
Typical Move Order
- Pirc Defense Example:
-
- e4 d6 2. d4 Nf6 3. Nc3 e5 4. dxe5 dxe5 5. Qxd8+ Kxd8
- Plan for Black:
- King to e7/c7, play c6, develop knights to d7, and trade the dark-squared bishop.
-
- Caro-Kann Example:
-
- e4 c6 2. Nf3 d5 3. d3 dxe4 4. dxe4 Qxd1+ 5. Kxd1
- Plan for White:
- King to e2/c2, play c3, develop knights to d2, and trade the light-squared bishop.
-
Key Themes and Advantages
-
Endgame Preparation:
- The king’s central placement on e7/e2 or c7/c2 is ideal for the endgame.
- The king can quickly become active while remaining safe.
-
Restricting Opponent’s Pieces:
- Pawns on c6/c3 dominate the opponent’s knights and restrict their mobility.
- The a5/a4 pawn move prevents the opponent’s pawn breaks and creates useful outposts.
-
Dynamic Piece Placement:
- The knights on d7/d2 and bishops on c5/c4 are well-placed for both defense and attack.
-
Counterplay Against This Setup:
- If your opponent adopts this setup, use pawn breaks like f4 (for White) or f5 (for Black) to open the position and target the displaced king.
Key Takeaways
- Queenless Middle Games:
- The side with the displaced king often has an advantage if they know how to play the position correctly.
- Key Goals:
- Place the king on e7/e2 or c7/c2, trade the bishop matching the central pawn’s color, and use pawns to dominate the opponent’s pieces.
- Counterplay:
- Use pawn breaks like f4 or f5 to exploit the displaced king and open the position.
Tip 4: Playing With and Against the Bishop Pair
Core Concept
- When playing against the two bishops, exchange your bishop for the bishop that is the same color as your own bishop.
- For example, if you have a light-squared bishop and a knight, and your opponent has two bishops, trade your light-squared bishop for their light-squared bishop.
- This simplifies the position and reduces the power of the two bishops.
General Guidelines
-
Strategic Goals:
- After trading bishops, aim for a position where the remaining bishop (your opponent’s) is limited by pawns fixed on the same color as the bishop.
- Try to create a more closed position, which favors knights over bishops.
-
Pawn Structures to Watch For:
- Look for positions where your opponent’s remaining bishop has limited activity due to pawns fixed on its color.
- Example: If your opponent has a dark-squared bishop, aim to create a pawn structure with many pawns on dark squares.
-
When Not to Trade:
- If the resulting position does not restrict the opponent’s remaining bishop or if the position is very open, avoid the trade.
-
Reverse Concept:
- If you have the two bishops, avoid trading bishop for bishop. Keep both bishops active.
Example Openings and Positions
1. Old Benoni Setup
- Plan for Black:
- Black exchanges their dark-squared bishop for White’s dark-squared bishop using the move Bg5.
- Resulting Position:
- White has a light-squared bishop restricted by pawns on light squares.
- Black has a knight that can maneuver to strong squares (e.g., c4).
2. French Defense (Oddball Variation):
- Plan for Black:
- Play Ba6 to trade the dark-squared bishops.
- Resulting Position:
- White’s remaining dark-squared bishop is restricted by pawns on dark squares.
- Black’s knight can maneuver to strong squares (e.g., c4).

3. Nimzo-Indian Defense:
- General Idea:
- In the Nimzo, Black often plays against the two bishops by creating pawn structures that restrict one of White’s bishops.
- Example Plan:
- Trade a knight for one of White’s bishops early (e.g., on c3).
- Use pawns to restrict the remaining bishop.
Tactical and Strategic Motifs
-
Knight vs. Bishop Endgames:
- The long-term goal when playing against the two bishops is to transition into a favorable knight vs. bishop endgame.
- Example: If your opponent has a dark-squared bishop, aim for a position with pawns fixed on dark squares, making the bishop ineffective.
-
Key Moves:
- Knight Maneuvers:
- Route your knight to strong squares (e.g., c4, e4).
- Pawn Breaks:
- Use pawn moves (e.g., a4, f5) to restrict the opponent’s bishop or create outposts for your knight.
- Knight Maneuvers:
-
Opponent’s Resistance:
- If your opponent avoids the bishop trade (e.g., retreats their bishop), they often inconvenience themselves (e.g., lose castling rights or waste time).
- Example: In the French Defense example, if White avoids the trade on a6, their development is delayed.
Practical Examples
-
Game 1: Bishop Trade Success
- Position: After trading bishops, Black’s knight maneuvered to c4, dominating the light squares.
- Result: White’s remaining bishop was restricted by pawns, and Black transitioned to a winning knight vs. bishop endgame.
-
Game 2: Opponent Avoids Trade
- Position: White avoided the bishop trade by retreating their bishop (e.g., Ne2 instead of allowing Ba6).
- Result: White’s development was delayed, and Black gained a strong position with connected rooks and a mobilized king.
-
Game 3: Transition to Knight vs. Bishop
- Position: After trading bishops, Black created a pawn structure that restricted White’s remaining bishop.
- Result: Black transitioned to a knight vs. bishop endgame, where the knight dominated the board.
Key Takeaways
- When Against Two Bishops:
- Trade your bishop for the bishop of the same color.
- Aim for positions where the remaining bishop is restricted by pawns.
- Transition to a knight vs. bishop endgame when possible.
-
When You Have Two Bishops:
- Avoid trading bishop for bishop.
- Keep the position open to maximize the power of the bishop pair.
-
Practical Tip:
- This strategy is highly effective at lower levels (e.g., sub-2000 rating) where opponents may not recognize the long-term consequences of bishop trades.
Tip 5: Using Knights on c6 and e7 to Counter the French Exchange Variation
Core Concept
- The French Exchange Variation is often seen as drawish and symmetrical, but with the correct setup, Black can play for a win.
- The key is to adopt an unusual knight placement and a flexible pawn structure to create imbalances and attacking opportunities.
Key Setup for Black
-
Knight Placement:
- Place knights on c6 and e7 (not f6).
- This avoids symmetry and allows flexibility in controlling key squares like f5 and e5.
-
Pawn Structure:
- Play f6 early to control the e5 square and restrict White’s pieces.
- Keep the option open to castle long or short, depending on White’s setup.
-
Bishop Development:
- Develop the light-squared bishop to f5 or g4.
- Aim to trade light-squared bishops if possible, weakening White’s pawn structure and reducing their attack potential.
-
Queen Placement:
- Place the queen on d7 to support the bishop and prepare for castling long if needed.
Key Ideas and Plans
-
Control the e5 Square:
- The pawn on f6 is critical for controlling e5, preventing White’s knight or bishop from occupying this square.
-
Light-Squared Bishop Trade:
- Trading light-squared bishops (via Bf5 or Bg4) weakens White’s pawn structure and limits their attacking chances.
-
Flexible Castling:
- Decide whether to castle long or short based on White’s setup:
- Castle long if White is slow to develop or pushes pawns on the kingside.
- Castle short if White aggressively expands on the queenside.
- Decide whether to castle long or short based on White’s setup:
-
Knight Maneuvers:
- After placing knights on c6 and e7, consider moves like Ng6 or Nh4 to create attacking chances.
-
Attacking Potential:
- If Black castles long, launch a pawn storm on the kingside (e.g., g5, h5).
- Use the f6 pawn to dominate White’s knight and create weaknesses in their position.
Example Game Plans
-
Aggressive Play with Long Castling:
- Develop the bishop to g4, provoke weaknesses (e.g., h3), and retreat the bishop.
- Castle long and push kingside pawns (g5, h5) to attack White’s king.
-
Positional Play with Short Castling:
- Develop the bishop to f5, trade light-squared bishops, and castle short.
- Focus on controlling the center and creating outposts for the knights (e.g., c4).
Key Themes and Advantages
-
Imbalanced Position:
- The unusual knight placement (c6, e7) and pawn structure create imbalances that favor Black.
-
Restricting White’s Pieces:
- The pawn on f6 dominates White’s knight and bishop, limiting their activity.
-
Dynamic Play:
- The flexibility in castling and pawn breaks allows Black to adapt to White’s plans and play for a win.
-
Works for Both Colors:
- This setup can also be used by White in the French Exchange Variation by mirroring Black’s moves.
Tip 6: Countering the e6-f5 Structure with the g4 Pawn Break
Core Concept
- When facing the e6-f5 pawn structure, the best way to counter it is by preparing and executing the g4 pawn break.
- This plan is highly effective when both sides are castled on the same side (commonly kingside).
Key Steps
-
Prepare the g4 Break:
- Play f3 to support the g4 pawn push.
- Optionally, play h3 to stabilize the structure and prepare for g4.
-
Execute g4:
- After playing g4, aim to recapture with the f-pawn (not the h-pawn).
- This opens the f-file and g-file, creating attacking opportunities.
-
King Safety:
- Move the king to h1 (or h2) to avoid potential pins and attacks along the open g-file.
Typical Setup
- White’s Pieces:
- Knight on d3 (or e5 temporarily before returning to d3).
- Pawns on f3 and g4.
- King on h1 (or h2).
- Rook(s) ready to use the open files (f-file and g-file).
- Black’s Pieces:
- Pawns on f6 and g5.
- Knight on e4 (a common defensive setup for Black).
Key Positional Ideas
-
Why g4 Works:
- The g4 break undermines Black’s pawn structure and opens files for White’s rooks and queen.
- Recapturing with the f-pawn creates pressure on Black’s e5 and f6 pawns.
-
Knight Maneuvers:
- Place the knight on d3 to support the g4 break and control key central squares.
- Temporarily jump the knight to e5 to provoke exchanges or create threats.
-
When to Avoid g4:
- If Black is castled on the opposite side (e.g., queenside), avoid pushing pawns on the kingside as it weakens your king’s safety.
Example Openings and Structures
-
London System:
- Black often plays Bf5, wanting to trade off the light square bishop. If accepted, it leads to the e6-f5 pawn structure.
- White prepares f3 and g4, using the knight on d3 (re-route via Nf3-Ne5) to support the plan.

-
Caro-Kann Defense:
- In certain lines, Black plays Bf5 or White plays h3 to stop Bg4, leading to the same pawn structure.
Practical Game Examples
-
London System Example:
- White prepares the g4 break:
-
- d4 Nf6 2. Bf4 c5 3. e3 cxd4 4. exd4 d5 5. c3 Nc6 6. Nd2 g6 7. Bd3 Bg 8. Nf3 O-O 9. 0-0 Bf5 10. Bfx5 gxf5
- White’s plan is to re-route the f3 knight via e5 to d3, and then play f3, followed by King h1 and Rg1 to prepare g4. If the opponent takes the knight on e5, simply recapture with the dark squared bishop.
-
- Result:
- White opens the f-file and g-file, creates pressure on Black’s pawns, and gains strong attacking chances.
- White prepares the g4 break:
-
Caro-Kann Example:
- White plays h3 to prevent Black’s bg4
- Black plays Bbf5*, leading to the same structure after White accepts the trade.
-
White uses the same plan: f3, and then g4 is possible because supported by h3.

-
Bullet Game Example:
- Even in fast time controls, the g4 break is effective:
- White follows the same steps: knight to d3, f3, g4, and King h1. White is already at +1 according to the engine.
- The resulting open files lead to a quick attack and decisive advantage.
- Even in fast time controls, the g4 break is effective:
Key Themes and Advantages
-
Attacking Potential:
- The g4 break opens the position and creates attacking chances on the kingside.
- The f-file and g-file become powerful avenues for rooks and queens.
-
Undermining Black’s Plan:
- Black’s knight on e4 and pawns on e6/f5 are destabilized by the g4 break.
- The knight on d3 complements the pawn structure and supports the attack.
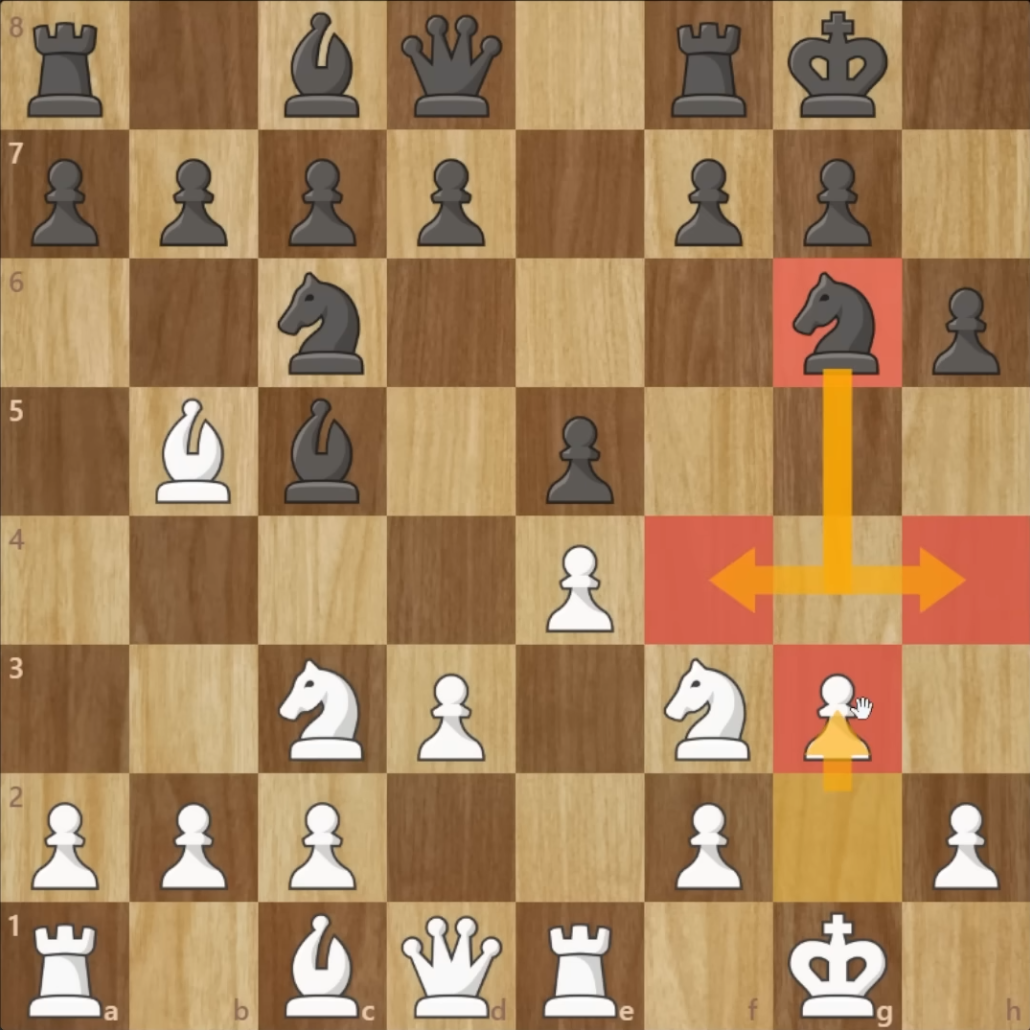
Tip 7: Using h-Pawn and a-Pawn Pushes to Exploit Fianchetto Setups
Core Concept
- Pushing the h-pawn (or a-pawn on the queenside) is highly effective against fianchetto setups, but only under specific conditions:
- The knight must not be on f6 (or c3 for the queenside), and it must not be able to return to those squares.
- The push creates significant weaknesses and attacking opportunities, especially when the opponent’s king is castled on the same side.
Key Conditions for the h-Pawn Push
-
Opponent’s Pawn Structure:
- A fianchetto pawn structure (e.g., pawns on g6 and f7, bishop on g7) is present.
- The knight on f6 is either missing or unable to return to f6 (e.g., blocked by a pawn on e5).
-
Your Pawn Structure:
- Ideally, you have a pawn on e5 to control the f6 square and prevent the knight from returning.
-
Castling:
- Works best when both sides are castled on the same side (kingside or queenside).
- If the opponent’s king is castled on the opposite side, the pawn push may weaken your own king’s safety.
Key Ideas and Plans
-
When to Push the h-Pawn:
- Push h4-h5 to weaken the opponent’s kingside pawn structure.
- If Black plays h6 to fixate your pawn on h5:
- Target the weakened dark squares (e.g., g6, h7) with a Queen + bishop battery.
- If Black plays g6:
- Sacrifice on g6 or prepare to open the h-file for an attack.
-
Follow-Up Plans:
- Open the h-file for rooks and queen.
- Use pieces (e.g., queen, bishop, knight) to target weakened squares around the opponent’s king (e.g., g6, h7).
-
Queenside Equivalent:
- The same principles apply to the a-pawn against a queenside fianchetto (e.g., pawns on b6 and c7, bishop on b7).
- Push a4-a5 to weaken the opponent’s queenside pawn structure and create outposts (e.g., b5).
Typical Move Order
-
Kingside Example (h-Pawn Push):
- White prepares h5 to weaken Black’s structure or force concessions.
-
Queenside Example (a-Pawn Push):
- White targets the b6 pawn, creating weaknesses and potential outposts on b5.
Practical Game Examples
-
London System vs. Kingside Fianchetto:
- White pushes h4, forcing Black to respond with h6 or g5.
- Result:
- If h6, White can play h4-h5, restricting Black’s pieces.
- If g6, White sacrifices on g6 or opens the h-file for an attack.
-
Queenside a-Pawn Push in the Nimzo Setup:
- White pushes a4-a5, targeting the b6 pawn and creating an outpost on b5.
- Result:
- If Black plays b5, White gains control of the c5 square.
- If Black plays a6, the a6 pawn becomes a target for White’s pieces.
Key Themes and Advantages
-
Weakening the Opponent’s Structure:
- The h-pawn (or a-pawn) push forces weaknesses in the opponent’s pawn structure (e.g., g6, h6, b6).
-
Creating Outposts:
- The pawn push often creates key outposts for pieces (e.g., knights on g5 or b5).
-
Dynamic Attacking Potential:
- Opens files (e.g., h-file or a-file) for rooks and queen to attack the opponent’s king.
-
Flexibility:
- Works for both sides (White and Black) depending on the position.
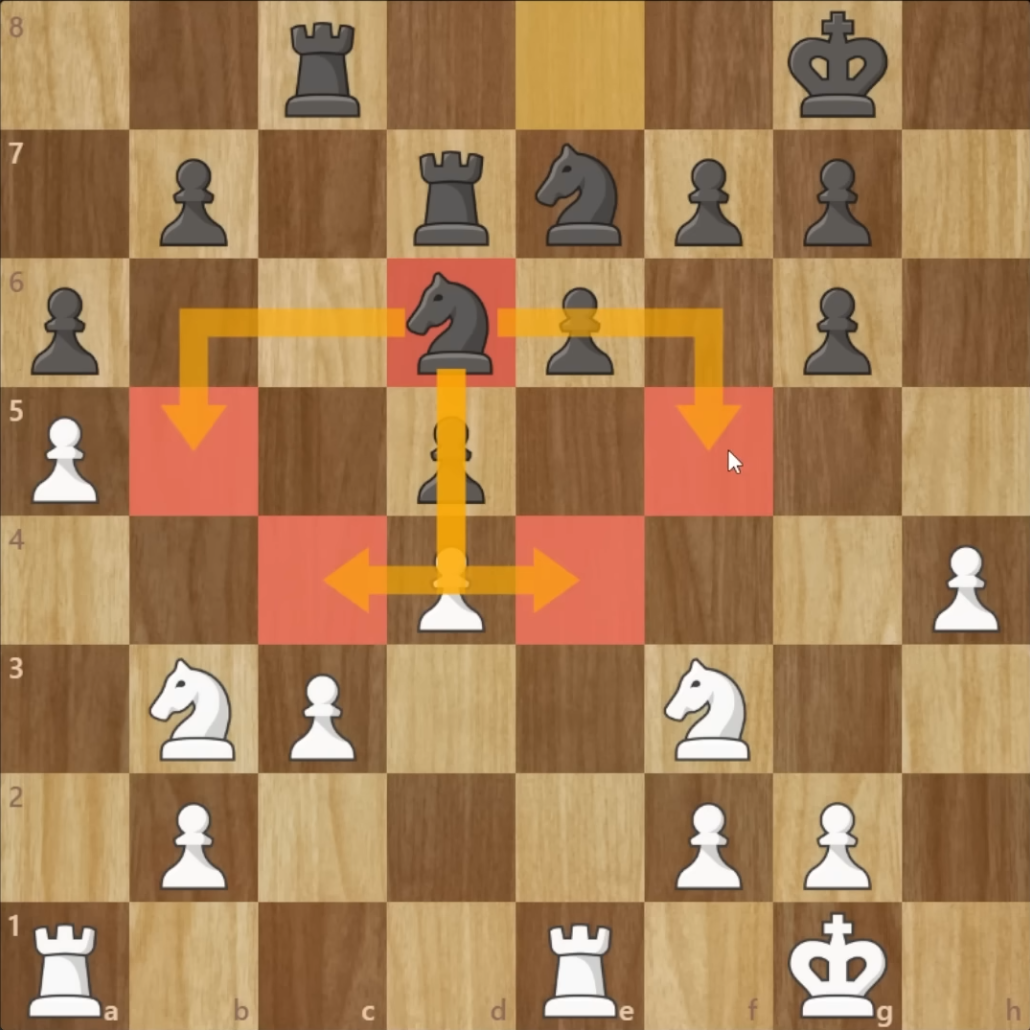
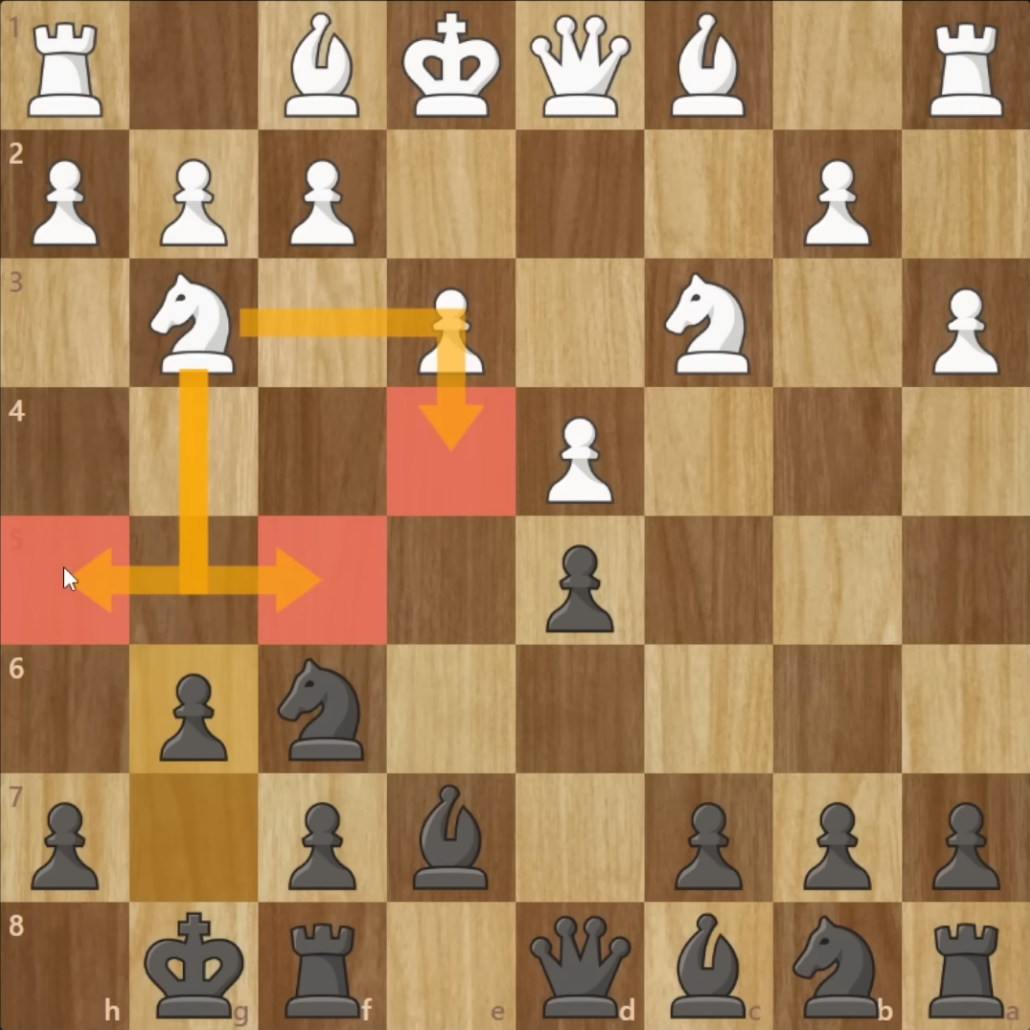
Tip 8: How to Deal with Aggressive Knights on f5 or f4
Core Concept
- An aggressive knight on f5 (or f4 for White) can be very annoying and dangerous, often threatening sacrifices or creating strong pressure.
- Instead of immediately trading the knight, which might not always be ideal, use strategic maneuvers to kick it out while maintaining your position.
Key Steps to Handle an Aggressive Knight
-
Prepare to Defend the h-Pawn:
- If the knight on f5 (or f4) threatens the h6 (or h3) pawn, ensure it is sufficiently defended before attempting to kick the knight out.
-
Key Defensive Maneuvers:
- Bishop Retreat to f8 (or f1):
- Move your bishop back to defend the h6 (or h3) pawn and prepare to support the pawn push g6 (or g3).
- King Move to h7 (or h2):
- Move the king to h7 (or h2) to add extra defense to the h6 (or h3) pawn.
- Knight Retreat to g8 (or g1):
- If necessary, retreat your knight to g8 (or g1) to further support the h-pawn and facilitate the pawn push.
- Bishop Retreat to f8 (or f1):
-
Push the g-Pawn:
- Once the h-pawn is defended, push g6 (or g3) to drive the knight away.
- After the knight retreats, the g-pawn will block the knight’s return and secure your position.
Common Tactics to Watch Out For
-
Knight Takes h6 (or h3):
- A common tactic when the knight is on f5 (or f4) is the sacrifice Nxh6 (or Nxh3) to expose your king.
- Ensure your f6 (or f3) knight or other pieces are re-routed to f8/f1, defending the h-pawn to avoid this tactic.
-
Bishop or Queen Pressure:
- The opponent may use a bishop or queen to attack the h-pawn in combination with the knight.
- Properly coordinate your pieces (bishop, king, knight) to defend against these threats.
Typical Defensive Setup
- For Black (Knight on f5):
- Move your rook from f8 to e8 to make rook for the bishop.
- Bishop on f8, king on h7, and knight on g8 (if needed).
-
Push g6 to drive the knight away and follow up with Bishop g7 to cover dark square weaknesses.
-
For White (Knight on f4):
- Bishop on f1 after moving the rook, king on h2, and knight on g1 (if needed).
- Push g3 to drive the knight away and follow up with Bishop g2 to cover dark square weaknesses.
Key Themes and Advantages
-
Control Over Weak Squares:
- After driving the knight away, secure the dark squares (g7 or g2) with your bishop.
-
Avoiding Immediate Trades:
- Avoid trading your bishop for the knight unless absolutely necessary. Keep your bishop for defensive and counterplay purposes.
-
Proactive Preparation:
- If you see a knight maneuvering toward f5 or f4, prepare in advance by moving your rook off the f-file (e.g., to e8 or e1) to free the f8 or f1 square for your bishop.
-
Works for Both Colors:
- The same principles apply whether you are White or Black.
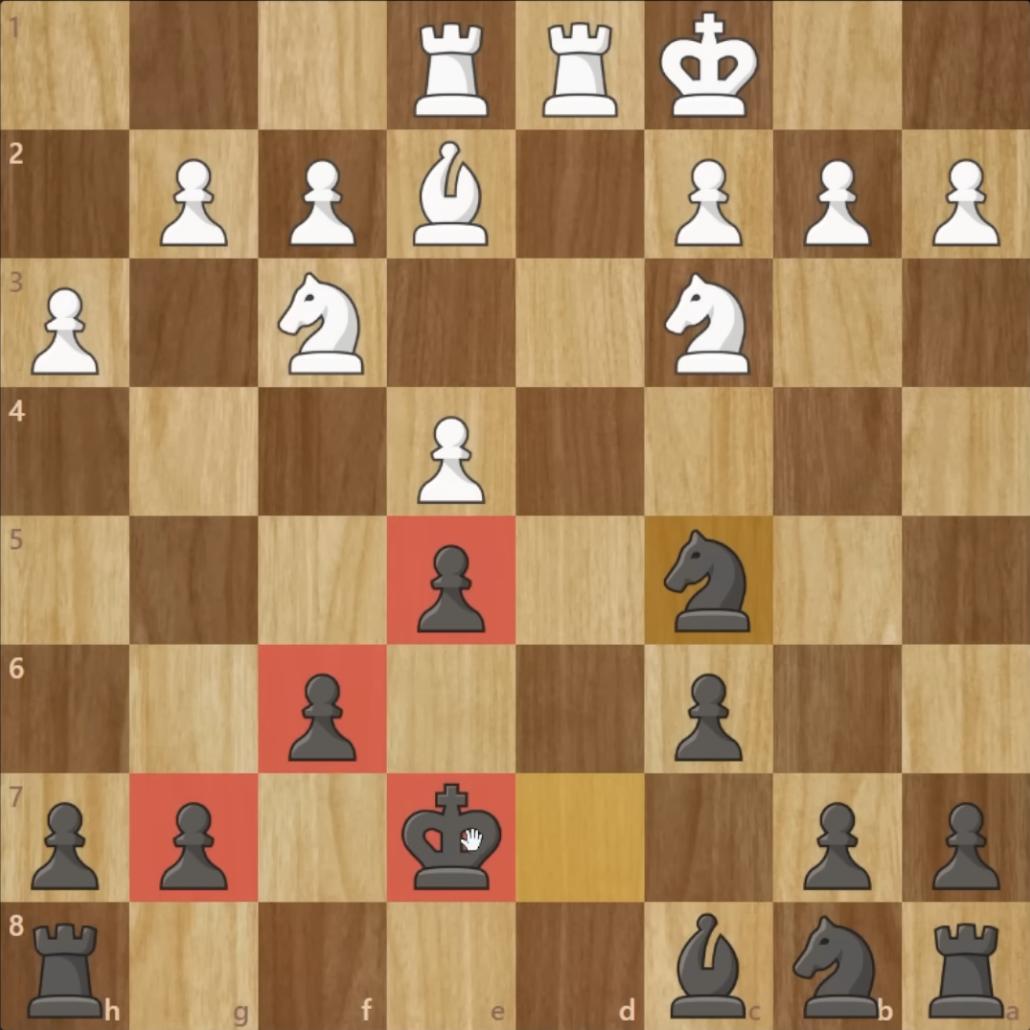
Tip 9: When to Pin a Knight and When Not To
Core Concept
- Pinning a knight with a bishop is a common tactic, but it is only effective if it creates concrete advantages (e.g., doubling pawns, forcing suboptimal moves, or creating tactical opportunities).
- Avoid pinning a knight if it is supported by another knight or if you gain nothing from the pin.
Key Guidelines for Pinning a Knight
-
When Pinning is Good:
- If the pinned knight cannot be supported by another knight.
- If the pin forces your opponent to make a suboptimal move (e.g., moving a knight to a less active square).
- If the pin creates a tactical advantage, such as doubling pawns or gaining a tempo.
-
When Pinning is Bad:
- If the pinned knight is already supported by another knight, making the pin ineffective.
- If the bishop will be forced to retreat without gaining anything.
- If you are likely to trade your bishop for the knight without gaining compensation (e.g., losing the bishop pair).
Examples and Practical Applications
1. Ruy Lopez (e4 e5 Nf3 Nc6 Bb5)
- Good Pin: If Black plays Nc6, the pin with Bb5 is effective because the knight is not yet supported.
- Bad Pin: If Black plays Nge7, avoid trading your bishop for the knight on c6. Trading gives up the bishop pair without compensation and also helps Black develop.
2. Nimzo-Indian Defense (1. d4 Nf6 2. c4 e6 3. Nc3 Bb4)
- Good Pin: The pin with Bb4 is effective because it threatens to double White’s pawns with Bxc3.
- Bad Pin: If White plays a3, retreat the bishop to a5 or e7 rather than capturing on c3 unless there is a clear advantage.
3. Italian Game (e4 e5 Nf3 Nc6 Bc4)
- Avoid pinning with Bg4 if White’s knight on f3 is supported by another knight (e.g., on d2). The pin achieves nothing and may lead to the loss of the bishop pair. It also allows white’s plan h3, Knight f1, Knight g3 with tempos.
Key Themes and Mistakes to Avoid
-
Avoid Trading Without Compensation:
- Do not trade your bishop for a knight unless you gain something tangible (e.g., doubled pawns, a tempo, or a strategic advantage).
-
Forcing Suboptimal Moves:
- If the pin forces your opponent to place a knight on a less active square (e.g., Nge7 instead of Nf6), the pin is effective even if you retreat the bishop later.
-
Be Flexible:
- If your pin is no longer effective (e.g., the knight becomes supported), retreat the bishop rather than stubbornly maintaining the pin.
Tip 10: Using the Queen on g4 with an Advanced e5 Pawn to Create Pressure
Core Concept
- Placing the queen on g4 is highly effective when you have an advanced e5 pawn, as it creates pressure on the g7 pawn and restricts your opponent’s ability to develop or castle comfortably.
- The e5 pawn controls the f6 square, preventing the opponent’s knight from developing there and leaving the g4 square safe for the queen.
Key Benefits of Queen on g4
-
Pressure on g7:
- Forces your opponent to make uncomfortable defensive moves, such as g6 (which weakens dark squares) or Rook g8 (which delays castling).
- If the opponent castles kingside, Bishop h6 often wins material (e.g., the rook on f8).
-
Safe Placement:
- The e5 pawn ensures the g4 square is safe from attacks by knights or pawns.
- The queen on g4 is active and often untouchable due to the pawn structure.
-
Disrupts Castling:
- The threat of Bishop h6 prevents the opponent from castling kingside.
- Castling queenside may also be unsafe due to your active pieces and potential pawn breaks.
Typical Scenarios
-
French Defense (Winawer Variation):
- Example: 1. e4 e6 2. d4 d5 3. Nc3 Bb4 4. e5 c5 5. a3 Bxc3+ 6. bxc3 Ne7 7. Qg4
- The queen on g4 pressures g7 and supports an attack on the kingside.
- If Black castles kingside, Bishop h6 wins material.
- Black struggles to defend without creating weaknesses (e.g., g6 or Rook g8).
- White responds with h4, preparing h5 to open the kingside.
- Example: 1. e4 e6 2. d4 d5 3. Nc3 Bb4 4. e5 c5 5. a3 Bxc3+ 6. bxc3 Ne7 7. Qg4
-
Alapin Sicilian: - The queen on g4 threatens h7 and supports pawn pushes like h4-h5. - The e5 pawn ensures the queen is safe on g4.
-
General Rule:
- The queen on g4 is most effective when:
- You have an e5 pawn controlling the f6 square.
- The opponent’s bishop on f8 has moved, leaving g7 vulnerable.
- The opponent’s king is either uncastled or castled kingside.
- The queen on g4 is most effective when:
Key Plans and Ideas
-
Follow-Up Moves:
- If the opponent plays g6:
- Exploit the weakened dark squares with moves like h4-h5, Bishop h6, or sacrifices on g6.
- If the opponent castles kingside:
- Play Bishop h6 to win material or create a devastating attack.
- If the opponent delays castling:
- Use the queen on g4 to restrict their development and prepare a kingside attack.
- If the opponent plays g6:
-
Supporting Pieces:
- Develop your pieces to support the attack:
- Place your bishop on h6 to target the rook on f8.
- Use your rooks to support pawn pushes like h4-h5 or to open files.
- Develop your pieces to support the attack:
-
Preventive Measures:
- Ensure your e5 pawn is well-defended to keep the g4 square safe for the queen.
- Avoid trading queens prematurely, as the queen on g4 is a key attacking piece.